Before you begin, you need to know if you’re going to create a new Group, or, if you’re going to join a Group that a friend, family member, or significant other has already created.

What is a Group?  A Group is what connects your lamp with that of your loved ones.  When you tap your lamp, everyone in your Group will get your saved color preference and message.  When someone else in your Group taps their lamp, you will receive theirs.

Let’s get started!

Which instructions do you want?

Setup a new Lamp and create a New Group

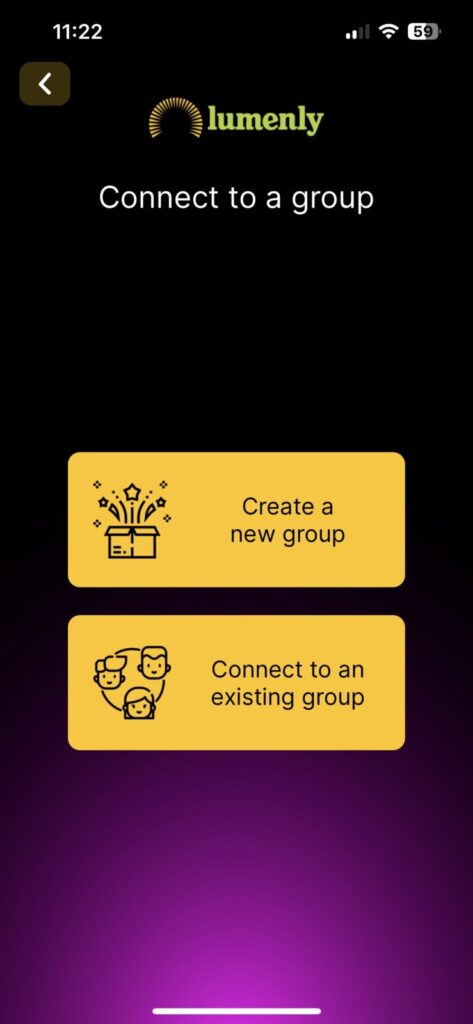
1. Tap “Create a new group”

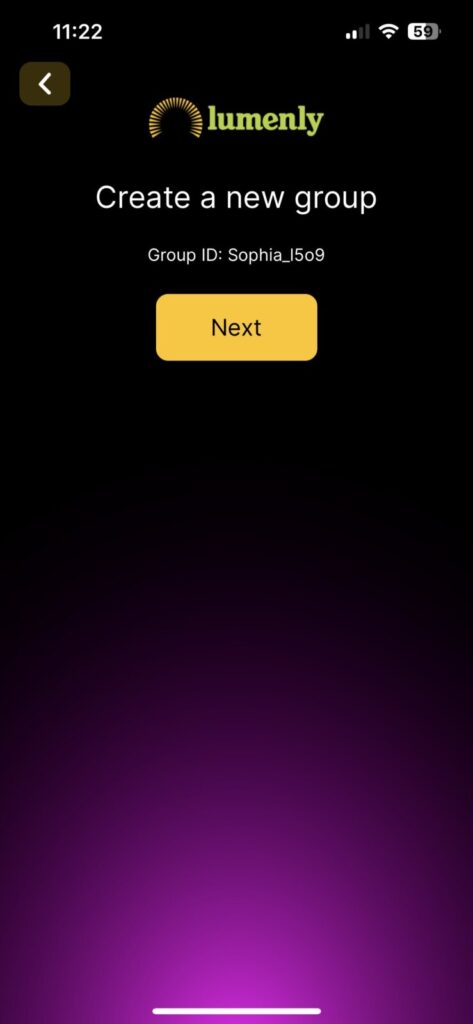
2. Note your Group ID at the top of the screen.  You can view and change this later after your lamp is setup.

3. Tap “Next”

4. Make sure your lamp is pulsing orange!  Nothing else will work if the lamp isn’t ready.

5. Tap “Continue”

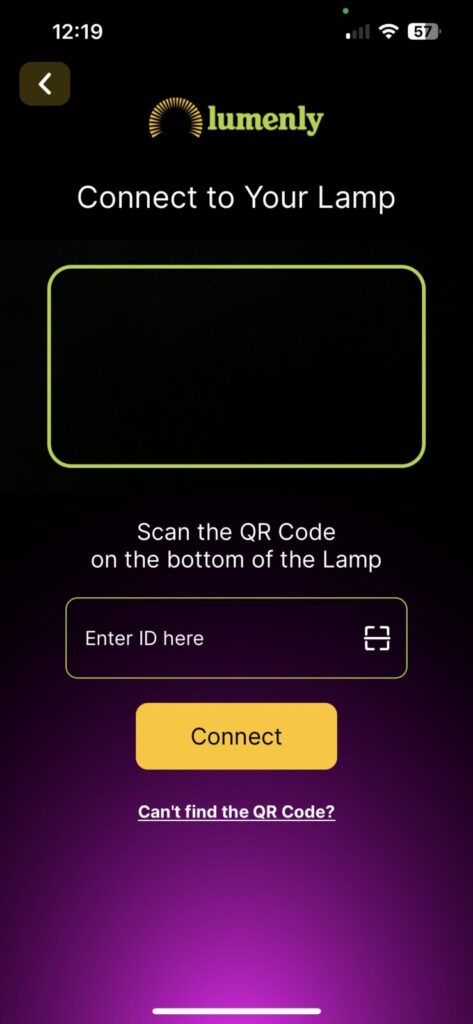
6. Allow the Lumenly App permission to use the camera and scan the QR code on bottom of the lamp, or you can manually type in the 6 digits in the empty field.

7. Tap “Connect”

8. Tap “Join”

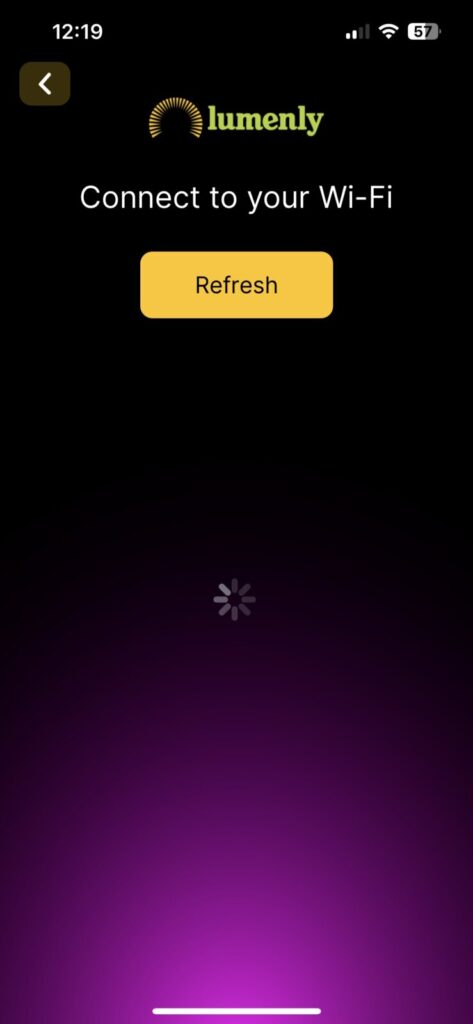
9. After a scan of the available networks, find your Wi-Fi on the list.  You may need to scroll if there are more than a few around.  If yours isn’t there, tap “Refresh”.  (Remember, our lamps currently only work on the 2.4g band, not 5g!)

10. Tap on your Wi-Fi name and enter your password.  Tap “Connect”

11. Wait for your lamp to connect to your Wi-Fi and make the connection to our network.

12. Choose your color preference and tap “Save”.  You can adjust your color and message at any time afterwards as well.

13. Tap “Go to Home”


Your lamp and new Group are setup!

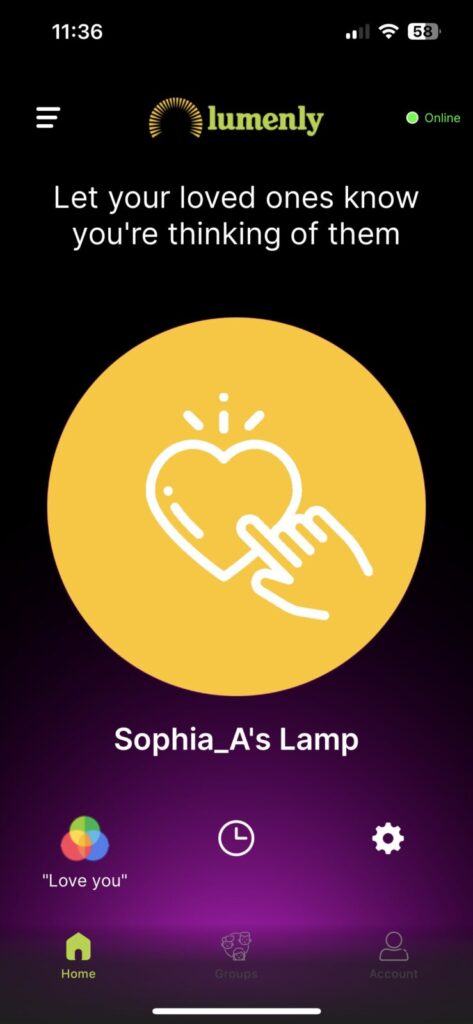
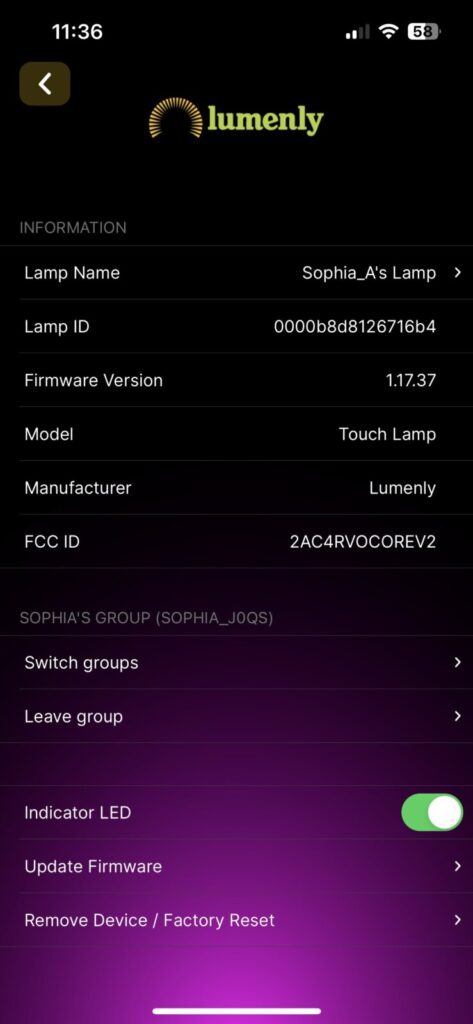
You can change your lamp name by clicking on the gear icon and tapping on “Lamp Name”.

You can create a new custom Group ID by clicking on the gear icon and tapping on “Switch Groups”.  This will allow you to create a custom Group ID if it’s not already taken.

The Name of your Group can be anything you want, but the Group ID has to be unique.

Setup a new Lamp and join an existing Group

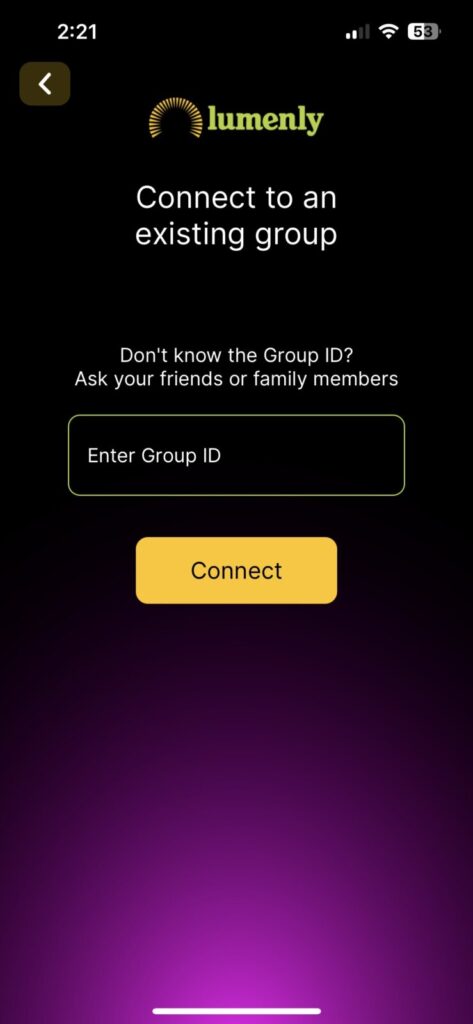
1. Tap “Connect to an existing group”

2. Enter the ID of the Group that your loved one created (you’ll have to ask them if they didn’t tell you yet)

3. Tap “Connect”

4. Make sure your lamp is pulsing orange!  Nothing else will work if the lamp isn’t ready.

5. Tap “Continue”

6. Allow the Lumenly App permission to use the camera and scan the QR code on bottom of the lamp, or you can manually type in the 6 digits in the empty field.

7. Tap “Connect”

8. Tap “Join”

9. After a scan of the available networks, find your Wi-Fi on the list.  You may need to scroll if there are more than a few around.  If yours isn’t there, tap “Refresh”.  (Remember, our lamps currently only work on the 2.4g band, not 5g!)

10. Tap on your Wi-Fi name and enter your password.  Tap “Connect”

11. Wait for your lamp to connect to your Wi-Fi and make the connection to our network.

12. Choose your color preference and tap “Save”.  You can adjust your color and message at any time afterwards as well.

13. Tap “Go to Home”


Your lamp is now setup!  A request was sent to the Group owner to approve.

Need more help?

Having issues?  Check out the FAQ or send your question to us.

  • This field is for validation purposes and should be left unchanged.

READY TO BUY?

Most orders are fulfilled and shipped same day.  Don’t wait!  Get yours now and connect with your loved ones today!

READY TO BUY?

Most orders are fulfilled and shipped same day.  Don’t wait!  Get yours now and connect with your loved ones today!